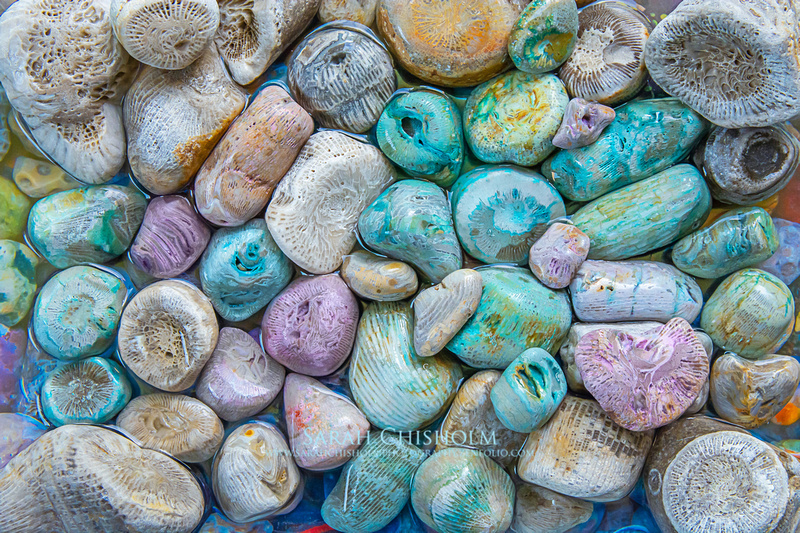
 "Colourful Horn Coral"These beauties are all of the extinct order Rugosa corals, which existed in Earth's ancient oceans for millions of years, starting 488 million years ago. The fossils pictured are in various states, from roughly tumbled from the beach, to highly polished, to coloured using the method discussed here.
  These beauties are all of the extinct order Rugosa corals, which existed in Earth's ancient oceans for millions of years, starting 488 million years ago. The fossils pictured are in various states, from roughly tumbled from the beach, to highly polished, to coloured using the method discussed here.
If you're familiar with my work, you'll know that colourful stones are what I love best, and my unique images of beach jewels are what I'm most known for as an artist. I've spent a lifetime learning about fossils and minerals and the like, and I've spent over a decade developing my creative style in an effort to dazzle the viewer with unique otherworldly scenes right out of the natural world. I sometimes find that others have attempted to emulate or even just steal my artwork to call it their own, which is just one of the reasons I'm usually very tight-lipped about how, and where, I create it. So it's a step out of the usual for me to share a process I've developed myself... but that's what I'm going to do here in this post! After all, this process has nothing to do with my artwork, it's just something I've been delighted with as a rockhound myself. I am going to share as much as I can, but it's up to you to do your own experimentation and research beyond my writings here.
I've very recently started to dye stones that have interesting details, but would otherwise be rather dull in colour. This is quite different from painting designs or staining them one uniform shade, as they still come out looking quite natural, with their original details colourfully enhanced. I love the results of my experiments, although they don't always turn out as expected! I'm happy that my fossil and rock collection is large enough to allow me to experiment with some of my "extras", and I really like how truly special they look after treatment. I now have bowls and jars full of stunningly coloured jewels all about my home.
Here's how to customize your own stones!
You'll need:
Neutral- coloured stones - polished or unpolished
Water
Vinegar
High-quality food colouring (I have also been using my own dyes made from plant matter, but food colouring is easier)
Oven and baking tray
Small plastic or glass jars (the smaller the vessel, the more concentrated your colours can be)
Spoon and protected surface (I use tinfoil)
(These instructions will be more conversational than numerical steps, because this is the first I'm writing them down, and as you'll read a bit further, you'll see I'm still learning myself!)
I've dyed both polished and "raw" beach stones of various materials. (I won't be getting into polishing stones or fossils in this post; that's a rabbit hole you'll have to go down yourself.) Some surfaces and types of minerals stain differently, but it's always best to start with a clean surface. Scrub your rocks well with soap and water; an old toothbrush works well to get into any small details.
Heat the oven to about 220°F and separate rocks on a tray, bake for about ten minutes.
Add cold water to a few small vessels (not quite to the top to allow for the stones) and then a splash of vinegar. This is necessary for the dye stick to the stone but also slightly erodes the surface, so don't use too much. Add lots of your selected food colouring until the mixture is very dark. When the stones are hot, use a spoon to gently drop them into the dye baths. Check them frequently and remove them as soon as they have obviously taken on colour - don't leave them too long or the surface will be affected by the vinegar. Give them a quick rinse under your tap (as an artist, I frequently have stained hands, but you might want to wear gloves) and set them on a protected surface. They will brighten up as they dry as well.
It is possible some weaker samples will crack when they are shocked into the colder water, but that will make for an interesting path for colour to seep into. I have found some types of stone and mineral take different colours of dye well, and others not so much. I find it fascinating to discover that some parts of a single stone have gone quite vibrant, and other sections remain their original colour. I think you'll be amazed at the variations in the behaviour of the different dye colours too.
When I was taking the photo of the horn coral fossil collection pictured here, I used a pool of water to wet the stones. Stones always look better and more detailed when wet, and that's still true even of some polished and dyed specimens. That's when I learned yet another thing in my technique - the colour starts to fade if the stones are left soaking in water. Oops! I'd never gotten the dyed rocks wet for photos before. I wasn't crushed - I simply heated up the oven and happily went about colouring again. This is good to know though. Now for individual rocks, depending on how they turn out in the dye bath, I can choose to seal the colour in and also give it that permanent wet look with a clear sealant, or rather leave it dry and enjoy the colour as is, or, if I don't love the colour, I can soak and scrub and go back to square one. (I've never sealed any of my rocks before, but I'll be experimenting with some that don't polish well otherwise.) I like options, and I like that this experimentation need not be permanent.
Rock collecting is a hobby that makes my soul happy. I hope you thoroughly enjoy this process from start to finish - from picking up the stones that speak to you, to revealing them in their fantastical new variation. I have collected for decades now, and I have some awesome fossils! If you are unable to collect your own rocks to play with, I can put some Rugosa horn coral and Favosite honeycomb corals in a package available for purchase so you can start your own collection. Some of the horn coral fossils in the photo are available as well. Ask me for details.
If you don't already, please follow my art pages on Facebook and Instagram. I'd be honoured!
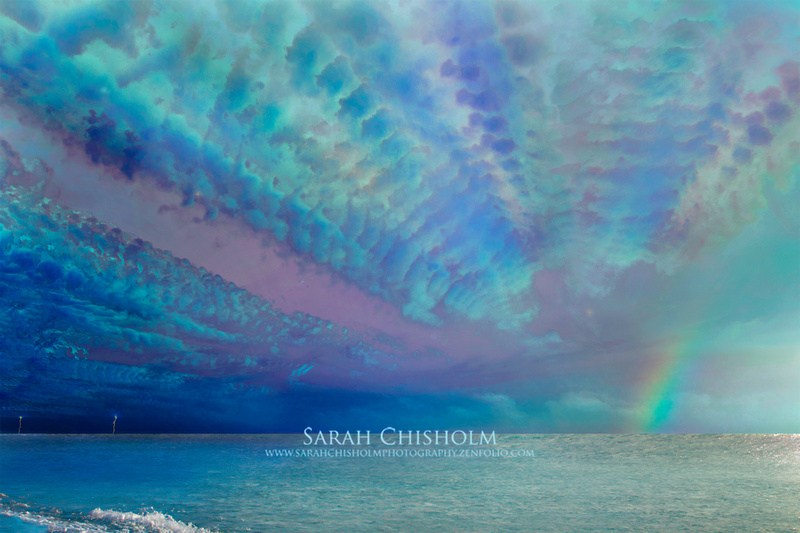
To view my beach stones images, visit: Beach Stones Gallery - I create incredible prints!
Check out one of my upcoming calendars for 2023: Storms & Stones Calendar
Good luck with your creations!
Sarah Chisholm